
7 posts tagged with "Cloud-native"

View All Tags

· 12 min read

The goal of iteration 008 is to add a database to the project.

At this point, it doesn't matter if it is no-SQL, or SQL-based because there are no relationships or transactions. Someone suggested I look at Prisma for my ORM. After some testing, I realized a free Azure SQL database wasn't going to work because, Prisma requires a 2nd database, although only temporarily, for diffing the migrations.

While I'm sure Prisma has its purpose, at this stage of the project, it seems like overkill compared to adding a database and client library I'm more familiar with. A point in the project where boring is good.

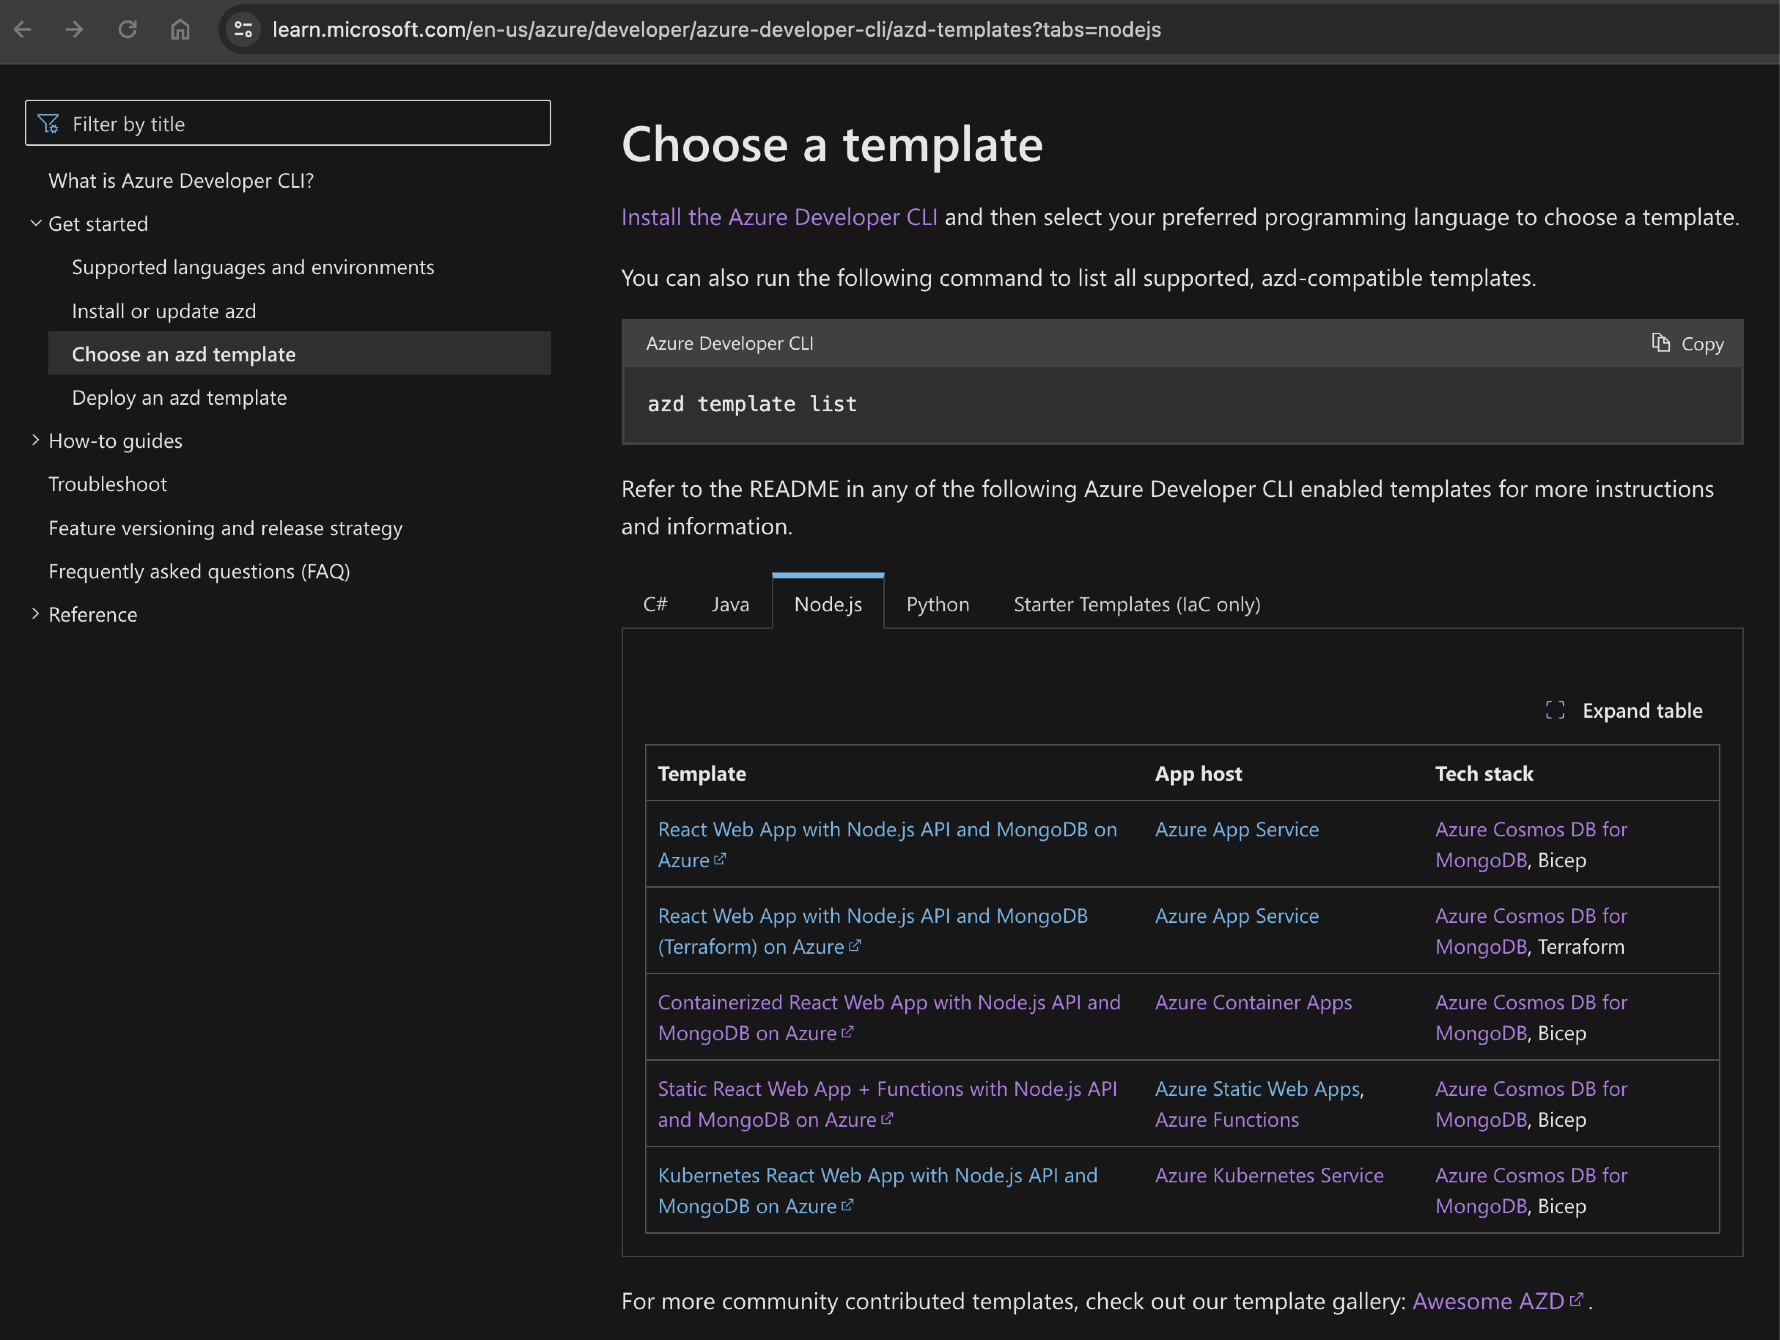
Since I'm already on Azure, selecting some flavor of SQL Server or Cosmos DB makes sense if there is a consumption (pay-as-you-go) pricing tier (SKU) which is free-ish for such as small project. Mongoose and the Cosmos DB API for MongoDB are expedient choices given the wealth of documentation for both for TypeScript/JavaScript.

Add a MongoDB container to the development environment

All the local services are managed by Docker compose for local development where possible. Add the MongoDB container so development and testing don't incur any pay-as-you-go costs.

version: "3"

services:
api-todo:
build:
context: ./api-todo
ports:
- "3000:3000"
depends_on:
- mongodb

client-todo:
build:
context: ./client-todo
environment:
VITE_USE_LOCAL_API: "true"
VITE_API_URL: http://localhost:3000
ports:
- "80:80"
depends_on:
- api-todo

mongodb:
image: mongo:5.0
restart: always
environment:
- MONGO_INITDB_ROOT_USERNAME=mongo
- MONGO_INITDB_ROOT_PASSWORD=MongoPass
ports:
- "27017:27017"
volumes:
- ./mongodata:/data/db

volumes:
mongodata:

Start the service in a separate terminal with:

docker compose up mongodb

I stole this idea from the Contoso Real Estate project which has a wealth of development environment configuration for you to use.

Now that the database is running, add the MongoDB viewer.

Visual Studio Code extension for MongoDB

Make sure you add the MongoDB viewer extension to the development environment, in the devcontainer.json.

    "customizations": {
"vscode": {
"extensions": [
...other extensions,

"mongodb.mongodb-vscode",
]
}
},

You can add a connection with a connection string so this can be used for both local and cloud databases.
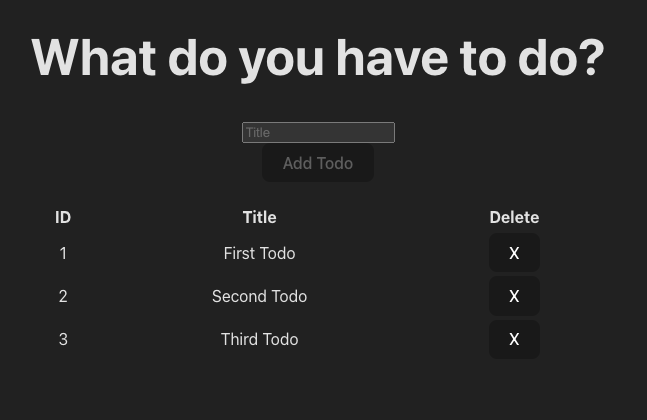
TODO shape

The shape of the TODO prior to this iteration was:

{
id: 123
title: 'Get Milk'
}

Update the shape to allow for data shape growth:

{
id: '65ad9ad0769c2853d2804f3f',
title: 'Get Milk',
description: 'the oaty kind',
createdAt: '2024-01-21T22:29:36.849Z',
updatedAt: ''
}

The title and description should have a max size to help the UI.

Install mongoose to API

TypeScript types are already in the package so just install it.

npm install mongoose

The package.json shows "mongoose": "^8.0.4", in the dependencies property.

Connect to the database

Before jumping in with code in the API, make sure you can connect to the database with the client library. Design your schema and make sure any restrictions, validations, and transformations are complete. Leave the script in the repo, it will be handy for the next person onboarded to the project to not have to figure out how to connection and view data. Keep this connection script all as a single file. This allows someone new to the team and Mongoose to understand how the pieces fit together.

const mongoose = require('mongoose');
const Schema = mongoose.Schema;

const COLLECTION = 'TodoConnectionTest';

// Run mongo with `docker compose up mongodb`
const URI = 'mongodb://mongo:MongoPass@localhost:27017/';

const TodoSchema = new Schema(
{
title: {
type: String,
unique: true,
minlength: 1,
maxlength: 40,
},
description: {
type: String,
maxlength: 1000,
default: null,
},
createdAt: {
type: String,
},
updatedAt: {
type: String,
default: null,
},
},
{
versionKey: false,
virtuals: true,
}
);

TodoSchema.virtual('id').get(function () {
return this._id.toHexString();
});

// Ensure virtual fields are serialised.
TodoSchema.set('toJSON', {
virtuals: true,
versionKey: false,
transform: function (doc, ret) {
delete ret._id;
},
});

const main = async () => {
// Connect to db
mongoose.connect(URI);

// Create a model
const TodoDb = mongoose.model(COLLECTION, TodoSchema);

// Using create
const saveResult1 = await TodoDb.create({
title: 'first todo',
description: 'description',
createdAt: new Date().toISOString(),
});
const transformed1 = saveResult1.toJSON();
console.log('Created lean--------------------------------');
console.log(transformed1);

// ADD MORE COMMANDS

};

main()
.then(() => {
console.log('done');
mongoose.disconnect();
})
.catch((e) => {
console.log(e);
});

Add a script to the package.json so you can test the connection:

"mongoose:test": "node ./scripts/test-mongo-connection.js"

TypeScript database service

Start with a generic CRUD class. All MongoDB collections will use this class to enforce consistency.

export default class CrudService<T> {
#model: Model<T>;

constructor(model: Model<T>) {
this.#model = model;
}

// Add
async add(doc: Partial<T>): Promise<T> {
const improvedDoc = {
...doc,
createdAt: new Date().toISOString(),
updatedAt: null,
};
const data = await this.#model.create(improvedDoc);

return data?.toJSON();
}

// Read
async get(id: string): Promise<T> {

const data = await this.#model.findById(id);

return data: data?.toJSON();
}

// Update
async update(
id: string,
update: Partial<T>
): Promise<T> {
const improvedDoc = { ...update, updatedAt: new Date().toISOString() };

const data = await this.#model.findByIdAndUpdate(id, improvedDoc, {
new: true,
});

return data?.toJSON();
}

// Delete
async delete(id: string): Promise<T> {
const data = await this.#model.findByIdAndDelete(id);

return data?.toJSON();
}

// Get All
async getAll(): Promise<T[]> {
const data = await this.#model.find();
return data;
}

// Delete All
async deleteAll(): Promise<unknown> {
const deleteAllResponse = await this.#model.deleteMany({});
return deleteAllResponse;
}

// Batch insert
async seed(docs: T[] | Partial<T>[]): Promise<T[]> {
const result = await this.#model.insertMany(docs);
return data;
}
}

MongoDB and the Mongoose client provide a high degree of configuration for what type of information to return from the mongoose calls. Its important to play with this in the previous script to determine what you want returned then apply those changes to this Crud class and the schema via the model that it uses.

  • _id versus id: MongoDB stores the unique id as _id but I want the REST API and the UI to only use id. Any transformations need to be done at this data layer. If this data service was used for automation or other movement of data between backend services, that would probably require some strict contracts so an ambitious DBA didn't make assumptions that the native _id was required.
  • transformation on single versus multiple items: many of the convenience functions run a query inside the mongoose client which is meant to operate on multiple values. When running queries, transformations applied to a single object (such as with create()) aren't applied to the objects. You need to either transform the objects yourself, or provide an aggregation pipeline to make sure you get the shape returned which you expect. This means your tests need to validate the shape of objects for all CRUD operations where you want data returned. You may opt to have have the transformations applied at the CRUD class level and the schema level, if the owner of the application code and the owner of the schema object definition are different people. For example, the tests might include:
    • Test property property count
    • Test property names
    • Test that _id and _v aren't returned
    • Test a new item only has the createdAt date
    • Test an updated item only has the updatedAt data
  • data returned: the mongoose client methods can return a stunning variety of values and information. For example, when updating, the returned information can include the data set in, the data after it was updated, or include the number of items which were updated. Be clear in your design when to return what kind of information. The API layer should only return what the UI needs.

Use the CRUD class for collections

Create an interface to provide a data layer contract:

export interface IDataClass<T> {
add: (todo: Partial<T>) => Promise<T>;
get: (id: string) => Promise<T>;
getAll: () => Promise<T[]>;
update: (id: string, todo: Partial<T>) => Promise<T>;
delete: (id: string) => Promise<T>;
deleteAll: () => Promise<unknown>;
batch: (todos: T[]) => Promise<T[]>;
}

If there are specific validations or transformations for a collection, apply them at a layer above the generic CRUD class.

export type CrudServiceResponse<T> = {
data: T | T[] | unknown | null;
error: Error | null | ValidationError | ValidationError[] | undefined;
valid?: boolean;
};

export class TodoService implements IDataClass<Todo> {
#service: CrudService<Todo>;

constructor(connection: mongoose.Connection) {
const ConnectedTodoModel = connection.model<Todo>('Todo', TodoSchema);
this.#service = new CrudService<Todo>(ConnectedTodoModel);
}

async get(id: string): Promise<CrudServiceResponse<Todo>> {
if (!id) {
return { data: null, error: new Error('id is required') };
}

return await this.#service.get(id);
}

async add(todo: Partial<Todo>): Promise<CrudServiceResponse<Todo>> {
const { valid, error } = isValidPartial(todo);
if (!valid) {
return { data: null, error: error };
}
const addResponse = await this.#service.add(todo);
return addResponse;
}

async update(
id: string,
todo: Partial<Todo>
): Promise<CrudServiceResponse<Todo>> {
if (!id) {
return { data: null, error: new Error('id is required') };
}

const { valid, error } = isValidPartial(todo);
if (!valid) {
return { data: null, error: error };
}

const updateResponse = await this.#service.update(id, {
title: todo.title as string,
description: todo.description as string,
updatedAt: new Date().toISOString(),
} as Todo);
return updateResponse;
}

async delete(id: string): Promise<CrudServiceResponse<Todo>> {
if (!id) {
return { data: null, error: new Error('id is required') };
}

return await this.#service.delete(id);
}
async getAll(): Promise<CrudServiceResponse<Todo[]>> {
return await this.#service.getAll();
}
async seed(
incomingTodos: Partial<Todo>[]
): Promise<CrudServiceResponse<Todo[]>> {
return await this.#service.seed(incomingTodos);
}
async deleteAll(): Promise<CrudServiceResponse<Todo[]>> {
const deleteResponse = await this.#service.deleteAll();
return deleteResponse;
}
}

Create the API routes and handlers

The API is separated between individual and multiple items.

// Multiples Routes

// Create Todo router with all routes then export it
const todosRouter = express.Router();

todosRouter.get('/', getAllTodosHandler);
todosRouter.patch('/', batchUploadTodoHandler);
todosRouter.delete('/', deleteAllTodoHandler);

// Catch-all route
todosRouter.all('*', (req, res) => {
sendResponse(req, res, StatusCodes.NOT_FOUND, { error: 'Not Found' });
return;
});
todosRouter.use(handleError);
// Singles Routes
// Create Todo router with all routes then export it
const todoRouter = express.Router();

todoRouter.get('/:id', getTodoHandler);
todoRouter.post('/', addTodoHandler);
todoRouter.put('/:id', updateTodoHandler);
todoRouter.delete('/:id', deleteTodoHandler);

// Catch-all route
todoRouter.all('*', (req, res) => {
sendResponse(req, res, StatusCodes.NOT_FOUND, { error: 'Not Found' });
return;
});
todoRouter.use(handleError);

Pull in the routes to the Express app:

// Route that operates on a single todo
app.use('/todo', todoRouter);

// Route that operates on multiple todos
app.use('/todos', todosRouter);

Test the APIs

You can use cURL, Postman, or Supertest.

## Single
curl -X GET http://localhost:3000/todo/65ac3b70d3adb5df333004d7 --verbose
curl -X POST -H "Content-Type: application/json" -d '{"todo": {"title":"CURL New Todo", "description":"This is a new todo"}}' http://localhost:3000/todo --verbose
curl -X PUT -H "Content-Type: application/json" -d '{"todo": {"title":"CURL XXX Updated Todo", "description":"This is an updated todo"}}' http://localhost:3000/todo/65ac3d1b4c60586e545b3628 --verbose
curl -X DELETE http://localhost:3000/todo/65ac396a9afd90f786ab1fee --verbose

## Multiple
curl -X GET http://localhost:3000/todos --verbose
curl -X PATCH -H "Content-Type: application/json" -d @batch.json http://localhost:3000/todos/ --verbose
curl -X DELETE http://localhost:3000/todos --verbose
import request from 'supertest';
import configureApp from './server'; // Import your Express app
import 'dotenv/config';

describe('Todo API against running MongoDB', () => {
it('test all todo routes', async () => {
process.env.NODE_ENV = 'test';

const { app, connection } = await configureApp();
await request(app).delete('/todos');

// Add one
const addOneResponse = await request(app)
.post('/todo')
.send({
todo: {
title: 'Sa1 - ' + Date.now(),
description: 'Sa2 - ' + Date.now(),
},
});
testAdd(addOneResponse);

// // Update one
const updateOneResponse = await request(app)
.put('/todo/' + addOneResponse.body.data.id)
.send({
todo: {
title: 'Su1 - ' + Date.now(),
description: 'su2 ' + Date.now(),
},
});
testUpdate(updateOneResponse);

// // Delete `Sa1`, `Su1` should still be there
const deletedOneResponse = await request(app).delete(
'/todo/' + addOneResponse.body.data.id
);
testDelete(deletedOneResponse);

// Batch all - after this call 3 items should be in the database
// 3 B
const addThreeBody = {
todos: [
{
title: 'B1a ' + Date.now(),
description: 'B1b' + Date.now(),
},
{
title: 'B2a' + Date.now(),
description: 'B2b' + Date.now(),
},
{
title: 'B3a' + Date.now(),
description: 'B3b' + Date.now(),
},
],
};
const batchResponse = await request(app).patch('/todos').send(addThreeBody);
testBatch(batchResponse);

// // Get All - should return four items
const getAllResponse = await request(app).get('/todos');
testGetAll(getAllResponse, 3);

// Delete All
const deleteAllResponse = await request(app).delete('/todos');
testDeleteAll(deleteAllResponse, 3);

if (connection) {
connection.close();
}
}, 30000);
});

Make sure you validate the data returned:

//write a function to test the shape of a Todo
const testTodoShape = (todo) => {
const keys = Object.keys(todo);

expect(keys.length).toEqual(5);
expect(keys).toContainEqual('id');
expect(keys).toContainEqual('title');
expect(keys).toContainEqual('description');
expect(keys).toContainEqual('createdAt');
expect(keys).toContainEqual('updatedAt');
};
const testTodoArrayShape = (todos) => {
expect(todos).toBeInstanceOf(Array);
todos.forEach(testTodoShape);
};

const testAdd = (addResponse) => {
// operational error
expect(addResponse.error).toEqual(false);

const { status, body } = addResponse;
expect(status).toEqual(201);
const { data, error } = body;
expect(error).toEqual(null);
expect(data).not.toEqual(null);
testTodoShape(data);
};

const testUpdate = (updateResponse) => {
// operational error
expect(updateResponse.error).toEqual(false);

const { status, body } = updateResponse;
expect(status).toEqual(202);
const { data, error } = body;
expect(error).toEqual(null);
expect(data).not.toEqual(null);
testTodoShape(data);
};

const testDelete = (deleteResponse) => {
// operational error
expect(deleteResponse.error).toEqual(false);

const { status, body } = deleteResponse;
expect(status).toEqual(202);
const { data, error } = body;
expect(error).toEqual(null);
expect(data).not.toEqual(null);
testTodoShape(data);
};

const testBatch = (batchResponse) => {
// operational error
expect(batchResponse.error).toEqual(false);

const { status, body } = batchResponse;
expect(status).toEqual(201);
const { data, error } = body;
expect(error).toEqual(null);
expect(data).not.toEqual(null);
testTodoArrayShape(data);
};

const testGetAll = (getAllResponse, dataLength) => {
// operational error
expect(getAllResponse.error).toEqual(false);

const { status, body } = getAllResponse;
expect(status).toEqual(200);
const { data, error } = body;
expect(error).toEqual(null);
expect(data).not.toEqual(null);
expect(data.length).toEqual(dataLength);
testTodoArrayShape(data);
};

const testDeleteAll = (deleteAllResponse, dataLength) => {
// operational error
expect(deleteAllResponse.error).toEqual(false);

const { status, body } = deleteAllResponse;
expect(status).toEqual(202);
const { data, error } = body;
expect(error).toEqual(null);
expect(data).not.toEqual(null);
expect(data.deletedCount).toEqual(dataLength);
};

Next step

The next step is to add this functionality to the cloud environment.

· 11 min read

This sixth iteration of the cloud-native project, https://github.com/dfberry/cloud-native-todo, added the client UI to the monorepo.

YouTube demo

  1. Use Vite React to create basic project structure.
  2. Add React page and components for Todo: form, list, item.
  3. Add Tests for components.
  4. Add API integration.

Reminder: A quick reminder that this project is using an in-memory DB at this point in the API. Each step of the way is meant to bootstrap the next step for speed instead of complete build out. This step is focusing on a bare-bones UI that interacts with the API.

Front-end framework choices and ChatGPT

This iteration is a proof of concept (POC) that can grow, as opposed to being thrown away. With that in mind, I picked Vite React as the frontend framework. I'm comfortable with React and I like the Vite toolchain.

In this day and age of ChatGPT everywhere, does it matter what framework you pick for a POC? This is up to you. Whatever answers or code your AI partner (such as ChatGPT) gives you, you still need to be able to integrate it and debug it. I suggest you pick something that you work with as though ChatGPT weren't available. If your team knows a different stack, and that stack has any duration (not built in the last year), go with that stack.

I considered Next.js, plain React, Vite React, and create-react-app (CRA). The POC needs velocity but not at the risk of the velocity or chaos of the underlying stack:

  • Next.js is a great framework but has its own ideas about the cloud.
  • Plain React means building out my own toolchain -- a waste of time compared to Next, Vite, CRA and other stacks that provide that.
  • Create React App has had some bumps in the road the last few years. Reminds me of the Angular 2,3,4,5 releases which is why I don't use Angular anymore.
  • Vite has been dependable in the last few projects so I'm sticking with that. ChatGPT answers enough of the Vite config and ViTest questions so that's a plus.

Creating the basic Vite React app

Vite has a quick ability to scaffold out the app with the CLI for a variety of front-end frameworks including React, Vue, and Svelte, and Electron. I chose TypeScript and SWC.

npm create vite@latest

This gives a basic runnable app with ESLint already configured.

{
"name": "vite-project",
"private": true,
"version": "0.0.0",
"type": "module",
"scripts": {
"dev": "vite",
"build": "tsc && vite build",
"lint": "eslint . --ext ts,tsx --report-unused-disable-directives --max-warnings 0",
"preview": "vite preview"
},
"dependencies": {
"react": "^18.2.0",
"react-dom": "^18.2.0"
},
"devDependencies": {
"@types/react": "^18.2.43",
"@types/react-dom": "^18.2.17",
"@typescript-eslint/eslint-plugin": "^6.14.0",
"@typescript-eslint/parser": "^6.14.0",
"@vitejs/plugin-react-swc": "^3.5.0",
"eslint": "^8.55.0",
"eslint-plugin-react-hooks": "^4.6.0",
"eslint-plugin-react-refresh": "^0.4.5",
"typescript": "^5.2.2",
"vite": "^5.0.8"
}
}

The vite.config.ts is where all the configuration goes.

Add environment variable for API

Create a .env file and add an environment variable prefixed with VITE_ for the API URL such as http://localhost:3000. When the client is deployed to the host, this URL will need to be changes and the front-end client build with the correct cloud URL. This URL is used later to build out the full API URL to fetch results:

const ENV_URL = import.meta.env.VITE_API_URL || 'http://localhost:3000';
if(!ENV_URL) {
console.log('VITE_API_URL is not defined');
}

export const API_URL = `${ENV_URL}/todo`;

For this POC, a simple API service looks like:

import { NewTodo } from './models';

const ENV_URL = import.meta.env.VITE_API_URL || 'http://localhost:3000';
if(!ENV_URL) {
console.log('VITE_API_URL is not defined');
}

export const API_URL = `${ENV_URL}/todo`;

export const addTodo = async (newTodo: NewTodo): Promise<Response> => {
return await fetch(API_URL, {
method: 'POST',
headers: {
'Content-Type': 'application/json',
},
body: JSON.stringify(newTodo),
});
};
export const deleteTodo = async (id: number): Promise<Response> => {
return await fetch(`${API_URL}/${id}`, {
method: 'DELETE',
});
};

Clean up the app

The main boilerplate for the Vite React app has a few things going on but none of which this POC needs at this point.

import { useState } from 'react'
import reactLogo from './assets/react.svg'
import viteLogo from '/vite.svg'
import './App.css'

function App() {
const [count, setCount] = useState(0)

return (
<>
<div>
<a href="https://vitejs.dev" target="_blank">
<img src={viteLogo} className="logo" alt="Vite logo" />
</a>
<a href="https://react.dev" target="_blank">
<img src={reactLogo} className="logo react" alt="React logo" />
</a>
</div>
<h1>Vite + React</h1>
<div className="card">
<button onClick={() => setCount((count) => count + 1)}>
count is {count}
</button>
<p>
Edit <code>src/App.tsx</code> and save to test HMR
</p>
</div>
<p className="read-the-docs">
Click on the Vite and React logos to learn more
</p>
</>
)
}

export default App

Replace the contents with a pared-down component:

import './App.css'

import Todo from './todo'

function App() {

return (
<>
<Todo />
</>
)
}

export default App

Add the page, form, list, and item

  1. To keep the client UI clean and clear, create a new subfolder for everything for the Todo named todo.

  2. Create the main todo page, index.tsx, which handled the events, API call, and child rerenders.

    import { useState } from 'react';
    import useSWR, { mutate } from 'swr';
    import TodoForm from './components/form';
    import List from './components/list';
    import { NewTodo, Todo } from './models';
    import { API_URL, addTodo, deleteTodo } from './service';
    import { fetcher } from './api';

    export default function Todo() {
    const [requestError, setRequestError] = useState('');
    const { data, error, isLoading } = useSWR(API_URL, fetcher)

    async function handleSubmit(newTodoItem: NewTodo) {
    setRequestError('');

    try {
    const result = await addTodo(newTodoItem);

    if (!result.ok) throw new Error(`result: ${result.status} ${result.statusText}`);
    const savedTodo = await result.json();
    mutate(API_URL, [...data, savedTodo], false);

    } catch (error: unknown) {
    setRequestError(String(error));
    }
    }

    async function handleDelete(id: number) {
    setRequestError('');
    try {
    const result = await deleteTodo(id);
    if (!result.ok) throw new Error(`result: ${result.status} ${result.statusText}`);
    mutate(API_URL, data.filter((todo: Todo) => todo.id !== id), false);
    } catch (error: unknown) {
    setRequestError(String(error));
    }
    }

    if (error && requestError) return <div>failed to load {error ? JSON.stringify(error) : requestError}</div>
    if (isLoading) return <div>loading...{JSON.stringify(isLoading)}</div>

    return (
    <div>
    <TodoForm onSubmit={handleSubmit} requestError={requestError} />
    <div>
    <List todos={data} onDelete={handleDelete} />
    </div>
    </div>
    )
    }
  3. Create the listing, components/list.tsx, to display the 3 default todos.

    import { Todo } from '../models';
    import Item from './item';

    export type { Todo };

    interface Props {
    todos: Todo[];
    onDelete: (id: number) => void;
    }

    export default function List({ todos, onDelete }: Props) {
    return (

    todos.length > 0 && (
    <table style={{ width: '100%', marginTop: '20px'}} data-testid="list">
    <thead>
    <tr>
    <th >ID</th>
    <th >Title</th>
    <th >Delete</th>
    </tr>
    </thead>
    <tbody>
    {todos.map((todo) => (
    <Item
    key={todo.id}
    todo={todo}
    onDelete={onDelete}
    />
    ))}
    </tbody>
    </table>
    )
    )
    }
  4. Add the Item, components/item.tsx, to display each item.

    import { Todo } from '../models';

    export type { Todo };

    export interface ItemProps {
    todo: Todo;
    onDelete: (id: number) => void;
    }

    export default function Item({ todo, onDelete }: ItemProps) {

    return (
    <tr data-testid="item-row">
    <td data-testid="item-id">{todo.id}</td>
    <td data-testid="item-title">{todo.title}</td>
    <td data-testid="item-delete">
    <button onClick={() => onDelete(todo.id)} >X</button>
    </td>
    </tr>
    );
    }

    Notice the attributes for testing, named data_testid are included already.

  5. Add the Form, components/form.tsx, to capture a new todo item.

    import { FormEvent, KeyboardEvent, ChangeEvent, useRef, useState } from 'react';
    import { NewTodo } from '../models';

    export type { NewTodo };

    interface Props {
    onSubmit: (newTodoItem: NewTodo) => void;
    requestError?: string;
    }
    export default function TodoForm({ onSubmit, requestError }: Props) {
    const formRef = useRef<HTMLFormElement>(null);
    const [newTodo, setNewTodo] = useState<NewTodo>({ title: '' });

    const handleSubmit = (event: FormEvent<HTMLFormElement>) => {
    event.preventDefault();
    const formData = new FormData(event.currentTarget);
    const title = formData.get('title')?.toString() || null;

    if (title !== null) {

    onSubmit({
    title
    });
    if (formRef.current) {
    formRef.current.reset();
    }
    // Reset the newTodo state
    setNewTodo({ title: '' });
    }
    }

    const handleKeyDown = (event: KeyboardEvent<HTMLInputElement>) => {
    if (event.key === 'Enter') {
    if (formRef.current) {
    formRef.current.dispatchEvent(new Event('submit', { cancelable: true }));
    }
    }
    };
    const handleInputChange = (event: ChangeEvent<HTMLInputElement>) => {
    setNewTodo({
    title: event.target.value,
    });
    };
    return (
    <div >
    <div>
    <h1 >What do you have to do?</h1>
    </div>
    <form ref={formRef} onSubmit={handleSubmit} data-testid="todo-form">
    <div >
    <input
    id="todoTitle"
    name="title"
    type="text"
    value={newTodo.title}
    placeholder="Title"
    onChange={handleInputChange}
    onKeyDown={handleKeyDown}
    data-testid="todo-form-input-title"
    />
    </div>
    {requestError && (
    <div data-testid="todo-error">
    {requestError}
    </div>
    )}
    <button type="submit" disabled={!newTodo.title} data-testid="todo-button">Add Todo</button>
    </form>
    </div>
    );
    }
  6. Add any dependency code such as the API service and its API fetcher for SWR, and the TypeScript models for a new todo and an existing todo.

  7. Start the API and the client UI to use the form.

    Browser todo app

    The form accepts a title to add a new todo, or deletes a todo using the X on each item's room.

Note: This UI isn't styled and the little style that is there is mostly defaults. If you aren't comfortable with CSS or style libraries, use ChatGPT and GitHub CoPilot for this.

Add ViTest UI tests

Now that the bare bones proof of concept is working, add the UI tests to validate it. This is important so that any future changes to the app don't break existing functionality.

The tests cover the following simple cases:

  • renders form without error
  • renders form with error
  • renders button disabled
  • renders button enabled
  • accepts input text
  • submit form by button
  • submit form by keypress enter
  • item component deletes item
  • renders List with todos
  • does not render List when todos is empty
  1. Add ViTest following the instructions for that site and a few other packages for testing UI with ViTest. Refer to the package.json for the complete list.

    npm install -D vitest @vitest/ui
  2. Create the vitest.config.ts file for configurations:

    import path from 'node:path';
    import { defineConfig, defaultExclude } from 'vitest/config';
    import configuration from './vite.config';

    const config = {
    ...configuration,
    test: {
    reporters: ['json', 'default'],
    outputFile: { json: "./test-output/test-results.json" },
    globals: true,
    setupFiles: path.resolve(__dirname, 'test/setup.ts'),
    exclude: [...defaultExclude],
    environmentMatchGlobs: [
    ['**/*.test.tsx', 'jsdom'],
    ['**/*.component.test.ts', 'jsdom'],
    ]
    },
    };

    export default defineConfig(config);

    The outputFile keeps the output files out of the way. The setupFiles also keep the test setup files tucked away.

  3. The hardest part about getting these tests to work was the TypeScript types for the testing library user events such as await user.type(input, title). The test setup and utility files helped with that. If you run into this, make sure to restart your TS Server in Visual Studio Code as well.

    // test/setup.ts
    import '@testing-library/jest-dom/vitest';
// test/utilities.ts
import type { ReactElement } from 'react';
import { render as renderComponent } from '@testing-library/react';
import userEvent from '@testing-library/user-event';

type RenderOptions = Parameters<typeof renderComponent>[1];

export * from '@testing-library/react';

export const render = (ui: ReactElement, options?: RenderOptions) => {
return {
...renderComponent(ui, options),
user: userEvent.setup(),
};
};
```
  1. Then the User event test, such as the following, builds and runs.

    test('submit form by keypress enter', async () => {

    // new title
    const title = 'Test Todo';

    // mock add function
    const mockAdd = vi.fn();

    // render the component
    const { user, getByTestId } = render(<TodoForm onSubmit={mockAdd}/>);

    // Fill in the input
    const input = getByTestId('todo-form-input-title');
    await user.type(input, title);

    // submit form by keypress
    await user.type(input, '{enter}');

    // todo submitted to parent via onSubmit
    expect(mockAdd).toHaveBeenCalledTimes(1);
    expect(mockAdd).toHaveBeenCalledWith({ title });
    })
  2. Run the test with npm run test and see the results:

    Visual Studio Code terminal running tests

Where was CoPilot in this iteration?

Where did CoPilot succeed?

CoPilot came in handy in some of the places that I'm happy to let to handle:

  • Quick CSS tweaks - it's much faster to play with CSS when CoPilot is generating styles over and over.
  • Config files - I was surprised by how much CoPilot helped with Vite and ViTest.
  • Components - it wrote most of the component code, I asked for refactors and it provided those as well.
  • Tests - it wrote most of the UI tests for me in seconds.

Where did CoPilot fail?

The tricky parts of integration, especially across tools, dependencies, and versions are still tricky. I spent the most time on the TypeScript issue with the testing library for user events. The fix came from a StackOverflow post which I had to look for. Considering all the layers involved and the time already saved in other places I used CoPilot and ChatGPT, that seems like net positive time savings for a proof of concept.

Where to next?

Now that the UI code is written and works locally, the project needs a container for the UI, and it needs to provision the UI resources for that container in the cloud. The client container needs to talk to the API container correctly. Fun stuff!

· 6 min read

This fifth iteration of the cloud-native project, https://github.com/dfberry/cloud-native-todo, added the changes to deploy from the GitHub repository:

YouTube demo

  1. Add azure-dev.yml GitHub action to deploy from source code
  2. Run azd pipeline config
    • push action to repo
    • create Azure service principal with appropriate cloud permissions
    • create GitHub variables to connect to Azure service principal

Setup

In the fourth iteration, the project added the infrastructure as code (IaC), created with Azure Developer CLI with azd init. This created the ./azure.yml file and the ./infra folder. Using the infrastructure, the project was deployed with azd up from the local development environment (my local computer). That isn't sustainable or desirable. Let's change that so deployment happens from the source code repository.

Add azure-dev.yml GitHub action to deploy from source repository

The easiest way to find the correct azure-dev.yml is to use the official documentation to find the template closest to your deployed resources and sample.

Browser screenshot of the Azure Developer CLI template table by language and host

  1. Copy the contents of the template's azure-dev.yml file from the sample repository into your own source control in the ./github/workflows/azure-dev.yml file.

    Browser screenshot of template source code azure-dev.yml

  2. Add the name to the top of the file if one isn't there, such as name: AZD Deploy. This helps distinguish between other actions you have the in repository.

    name: AZD Deploy

    on:
    workflow_dispatch:
    push:
    # Run when commits are pushed to mainline branch (main or master)
    # Set this to the mainline branch you are using
    branches:
    - main
    - master
  3. Make sure the azure-dev.yml also has the workflow_dispatch as one of the on settings. This allows you to deploy manually from GitHub.

Run azd pipeline config to create deployment from source repository

  1. Switch to a branch you intend to be used for deployment such as main or dev. The current branch name is used to create the federated credentials.

  2. Run azd pipeline config

  3. If asked, log into your source control.

  4. When the process is complete, copy the service principal name and id. Mine looked something like:

    az-dev-12-04-2023-18-11-29 (abc2c40c-b547-4dca-b591-1a4590963066)

    When you need to add new configurations, you'll need to know either the name or ID to find it in the Microsoft Entra ID in the Azure portal.

Service principal for secure identity

The process created your service principal which is the identity used to deploy securely from GitHub to Azure. If you search for service principal in the Azure portal, it takes you Enterprise app. Don't go there. An Enterprise app is meant for other people, like customers, to log in. That's a different kind of thing. When you want to find your deployment service principal, search for Microsoft Entra ID.

  1. Go ahead ... find your service principal in the Azure portal by searching for Microsoft Entra ID. The service principals are listed under the Manage -> App registrations -> All applications.

  2. Select your service principal. This takes you to the Default Directory | App registrations.

  3. On the Manage -> Certificates & secrets, view the federated credentials.

    Browser screenshot of federated credentials

  4. On the Manage -> Roles and Administrators, view the Cloud Application Administrator.

When you want to remove this service principal, you can come back to the portal, or use Azure CLI's az ad sp delete --id <service-principal-id>

GitHub action variables to use service principal

The process added the service principal information to your GitHub repository as action variables.

  1. Open your GitHub repository in a browser and go to Settings.

  2. Select Security -> Secrets and variable -> Actions.

  3. Select variables to see the service principal variables.

    ![Browser screenshot of GitHub repository showing settings page with secure action variables table which lists the values necessary to deploy to Azure securely.]

  4. Take a look at the actions run as part of the push from the process. The Build/Test action ran successfully when AZD pushed the new pipeline file in commit 24f78f4. Look for the actions that run based on that commit.

    Browser screenshot of GitHub actions run with the commit

    Verify that the action ran successfully. Since this was the only change, the application should still have the 1.0.1 version number in the response from a root request.

When you want to remove these, you can come back to your repo's settings.

Test a deployment from source repository to Azure with Azure Developer CLI

To test the deployment, make a change and push to the repository. This can be in a branch you merge back into the default branch, or you can stay on the default branch to make the change and push. The important thing is that a push is made to the default branch to run the GitHub action.

In this project, a simple change to the API version in the ./api-todo/package.json's version property is enough of a change. And this change is reflected in the home route and the returned headers from an API call.

  1. Change the version from 1.0.1 to 1.0.2.
  2. Push the change to main.

Verify deployment from source repository to Azure with Azure Developer CLI

  1. Open the repository's actions panel to see the action to deploy complete.

    Browser screenshot of actions run from version change and push

  2. Select the AZD Deploy for that commit to understand it is the same deployment as the local deployment. Continue to drill into the action until you see the individual steps.

    Browser screenshot of action steps for deploying from GitHub to Azure from Azure Developer CLI

  3. Select the Deploy Application step and scroll to the bottom of that step. It shows the same deployed endpoint for the api-todo as the deployment from my local computer.

    Browser screenshot of Deploy Application step in GitHub action results

  4. Open the endpoint in a browser to see the updated version.

    Browser screenshot of updated application api-todo with new version number 1.0.2

Deployment from source code works

This application can now deploy the API app from source code with Azure Developer CLI.

Tips

After some trial and error, here are the tips I would suggest for this process:

  • Add a meaningful name to the azure-dev.yml. You will have several actions eventually, make sure the name of the deployment action is short and distinct.
  • Run azd pipeline config with the --principal-name switch in order to have a meaningful name.

Summary

This was an easy process for such an easy project. I'm interested to see how the infrastructure as code experience changes and the project changes.